
Essential Tools for Paver Installation in San Diego, CA
When embarking on the journey of laying down pavers, having the right equipment at your fingertips is crucial. Many individuals often find themselves grappling with inadequate tools that can lead to frustration and subpar results. The selection of appropriate instruments not only streamlines the process but also ensures a sturdy and aesthetically pleasing outcome.
Key implements that you shouldn’t overlook include:
- Compactor: A vital machine used to compress the substrate, ensuring a solid foundation for your pavers.
- Leveling Tool: Essential for achieving a perfectly flat surface, preventing future unevenness.
- Edge Restraints: These help maintain the integrity of your design by keeping the pavers in place.
- Rubber Mallet: Ideal for adjusting paver positioning without damaging their surfaces.
- Jointing Sand: This material fills the gaps between pavers, enhancing stability and preventing weed growth.
California Landscape Development knows the intricacies involved in such undertakings. We equip our teams with top-notch tools and equipment, ensuring that each step of the process is executed flawlessly. Our expertise guarantees that all aspects, from initial layout to the final touches, are handled with precision and care. Entrust us with your vision, and watch as we transform your outdoor space into a stunning reality!
California Landscape Development 11440 W Bernardo Ct STE 300, San Diego, CA 92127 +18583546742
For more information – Click Here
Preparing the Ground for Paver Placement in San Diego, CA
Establishing a solid foundation is paramount for ensuring the longevity and aesthetics of pavers. A common pitfall is neglecting to properly compact the subsoil. This crucial step prevents future settling and maintains an even surface, mitigating the risk of uneven wear.
Utilize a plate compactor to compress the base material effectively. Aim for a depth of at least 4 to 6 inches for the base layer, composed of crushed stone or gravel, which facilitates drainage and enhances stability.
- Ensure the ground is level before laying the base.
- For sloped areas, consider a slight incline to promote water runoff.
- Check moisture content; overly wet soil can lead to compaction issues.
Incorporating edging materials around the perimeter can significantly bolster the structure, preventing shifts over time. Using polymeric sand in the joints not only enhances interlock but also deters weed growth, ensuring your installation remains pristine longer.
Regularly inspecting the site for debris or organic matter can prevent unforeseen complications during the installation phase. A clean workspace allows for precise placement and alignment, crucial for achieving that polished look.
Understanding soil types can also impact your approach. Sandy soils may require less moisture for compaction, while clay-rich soils need careful consideration to avoid saturation. Tailoring your method according to these conditions ensures optimal results.
Choosing the Right Paver Material for Your San Diego Landscape
When selecting the ideal paving substance for your outdoor space, consider the climate and local nuances. In San Diego, the sun’s intensity and occasional downpours can affect durability and aesthetics. Opt for materials like concrete, brick, or natural stone that can withstand these environmental factors while enhancing your landscape.
Factors Influencing Material Selection
- Durability: Some materials, such as granite, offer exceptional longevity, making them perfect for high-traffic areas.
- Maintenance: Porous pavers may require sealants to prevent stains, while non-porous options are easier to clean.
- Style: Choose textures and hues that complement your existing architecture and landscaping elements.
- Cost-effectiveness: Weight the longevity of the material against its initial investment for a more informed decision.
Expert Tips for Material Evaluation
Before committing to a specific paver type, consider conducting a sample layout. This allows you to visualize how different materials interact with your garden, patio, or walkway. Furthermore, incorporating varying sizes and shapes can create a dynamic, eye-catching space.
California Landscape Development excels in offering tailored solutions. Our expertise in local conditions ensures that your chosen paver material not only meets aesthetic desires but also performs exceptionally well in your outdoor environment. By understanding the subtleties of San Diego’s climate, we guide you to selections that promise both beauty and resilience.
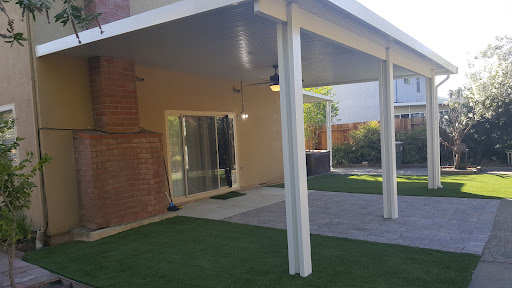
Step-by-Step Guide to Laying Pavers Correctly in San Diego, CA
Precision is paramount when it comes to setting down those vibrant stones. Begin with a thorough excavation to ensure a stable foundation, ideally around 6-8 inches deep. This depth allows for a robust base layer, crucial for preventing shifting over time.
A gravel base is essential. Opt for crushed stone or gravel, compacting it well to create a solid underlayment. This step not only promotes drainage but also fortifies the longevity of your installation. Utilizing a plate compactor can make this task more efficient and effective.
- Ensure your base material is level; use a string line to check for consistency.
- Incorporate a layer of sand, about 1 inch thick, to provide a cushion for your pavers.
- Use a screed board to level the sand, ensuring an even surface.
When placing the pavers, start from a corner or edge, working your way outwards. This method minimizes the risk of misalignment. Leave a small gap between each stone to allow for jointing material, which aids in stabilization and aesthetic appeal.
For those intricate patterns, planning is essential. Sketch your design beforehand to avoid unnecessary cuts and waste. Always cut pavers in a well-ventilated area using a wet saw to reduce dust.
Lastly, ensure to fill the gaps with polymeric sand or similar materials, which not only secures the pavers but also prevents weed growth. Water the surface lightly after applying the joint filler to activate its binding properties.
California Landscape Development excels in delivering exceptional results, transforming outdoor spaces with unparalleled expertise. Embrace the journey of creating stunning landscapes with confidence, knowing that your project is in capable hands!
Common Mistakes to Avoid During Paver Installation in San Diego, CA
Failure to prepare the subgrade properly can lead to uneven settling and shifting over time. A solid foundation is paramount, so ensure that the base is compacted thoroughly to prevent future issues. Without adequate drainage, water can accumulate under the stones, causing them to heave or crack. Installing a slight slope or incorporating a drainage system can alleviate these concerns.
Another frequent oversight is neglecting to use a polymeric sand or a similar joint filler between the pavers. This material prevents weed growth and keeps the pavers stable, thus maintaining their alignment. Be mindful of the spacing—too tight can lead to cracking while too loose allows for movement.
Key Tips for Successful Paver Installation
- Always measure twice and cut once. Precision in cutting ensures a seamless fit.
- Consider using a plate compactor after laying the pavers to ensure they are firmly seated.
- Utilize edging restraints to keep the surface intact and prevent shifting.
- Regularly check for levelness throughout the installation process; small adjustments can save significant headaches later.
California Landscape Development recognizes the nuances involved in laying pavers. Understanding the local climate and soil conditions is crucial, especially in coastal areas like San Diego. The influence of salt air on certain materials must be considered to ensure longevity.
Adopting a proactive approach to these common pitfalls can set the stage for a flawless installation. With expert guidance and meticulous planning, the dream outdoor space becomes a reality.
Final Touches: Sealing and Finishing Pavers in San Diego, CA
Completing the installation of pavers is just the opening act; the real magic happens during the sealing and finishing stage. This critical step protects your stones from the elements while enhancing their natural beauty. Improper sealing can lead to a myriad of issues, like fading colors or unsightly stains, which can tarnish the overall aesthetic appeal.
Choosing the right sealant is crucial. A water-based sealant offers a more environmentally friendly option, while solvent-based products tend to provide a richer sheen. Here are some expert recommendations:
- Ensure the pavers are completely dry before application to avoid trapping moisture.
- Apply the sealant on a cloudy day to prevent rapid evaporation, ensuring an even coat.
- Use a roller or sprayer for uniform distribution, and always backbrush to eliminate bubbles.
After sealing, the finishing touches can elevate the installation from mundane to magnificent. Consider using polymeric sand between the joints, which not only provides stability but also resists weed growth and insect infestation. Another tip is to add a durable edge restraint to maintain the integrity of the layout over time.
California Landscape Development excels in transforming outdoor spaces, ensuring that every detail is meticulously addressed. The focus on quality craftsmanship and attention to detail guarantees that your paver installation will withstand the test of time while looking stunning. With every step of the sealing and finishing process, the commitment to excellence shines through, making your landscape a true masterpiece.
Thank you for exploring the essential aspects of properly installing pavers with us at California Landscape Development. If you’re eager to enhance your outdoor space and want expert guidance tailored to your specific needs, we invite you to reach out for a free consultation. Our experienced team is ready to provide valuable insights and advice that will help you achieve the perfect installation for your project. Don’t hesitate to contact us today to start your journey toward a beautifully paved landscape!


